How to start a stream
Click PLAY button to start
Tutorial : How To Set Up a Low Latency Stream by nanocosmos
In this tutorial you'll get to know the basic functionality of the nanoStream Cloud: create, broadcast and watch a live stream with ultra-low-latency.
The process requires the following steps:
- create a bintu live stream on the dashboard
- configure your live encoder software or Webcaster
- use the nanoPlayer page or API to view the live stream
Create a Stream
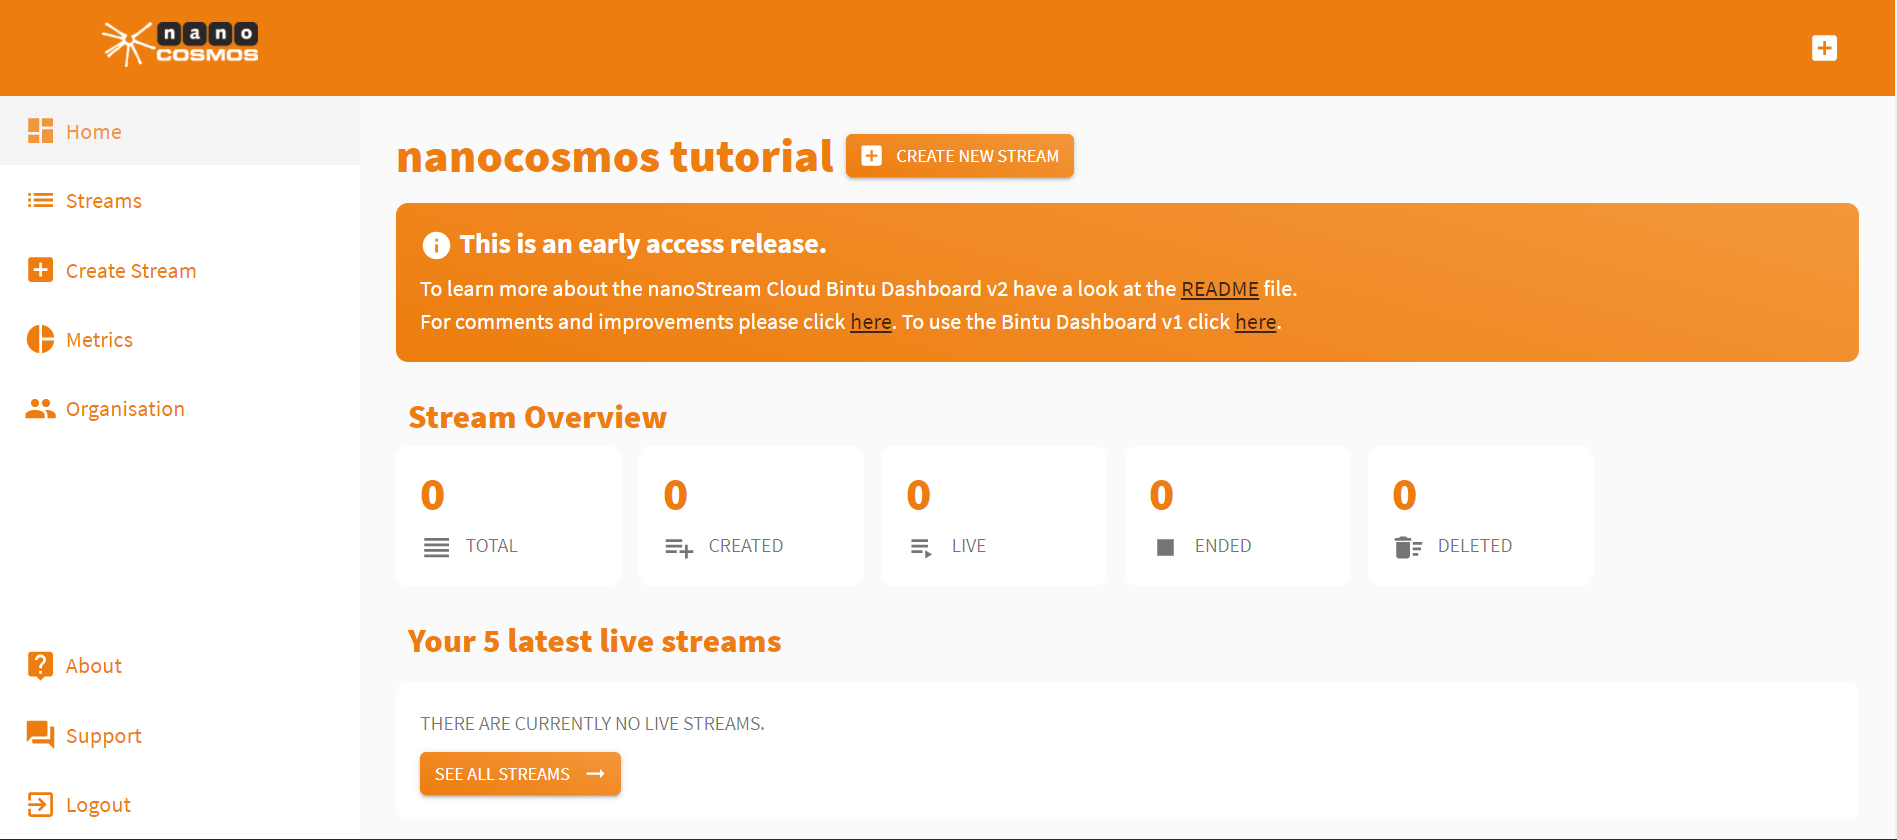
First, log in to your nanoStream Cloud/Bintu account.
Then, create a bintu live stream with Create Stream. You can press Create New Stream right next to your organization name or press the plus icon on the top of the site. Alternatively, you can navigate to the menu on the left hand side and press Streams and then Create New Stream.
To send a live stream, there are 2 options:
- use a separate live encoder software or hardware (for example OBS). (Read more here)
- use the nanoStream Webcaster web page or API directly from your browser. (Read more here)
Setting up a Live Stream Using the Webcaster
The Webcaster is a browser application that allows you to go live around the world immediately, without a separate setup.
Set up the video settings
- You can set up your source resolution and frame rate from a list of prefilled values.
- Select suitable values that fit your needs.
- If in doubt, just keep the default or contact customer support.
Set up the bitrates
- Similarly, you can set up your audio and video bitrates from a list of prefilled values.
- Select suitable values taking into account network bandwidth considerations.
- If in doubt, just keep the default or contact customer support.
Add Stream Tag
You can group and tag streams with bintu stream tags. These are human readable words or IDs you can use to identify your streams. This is optional.
- Click on
ADD STREAM TAGSto add search tags to your stream. - You can create new tags by typing onto the
Tagsfield and hitEnterto add it to the list. - Repeat this for all tags you want to add.
- Or add an existing tag through
Show all tags.
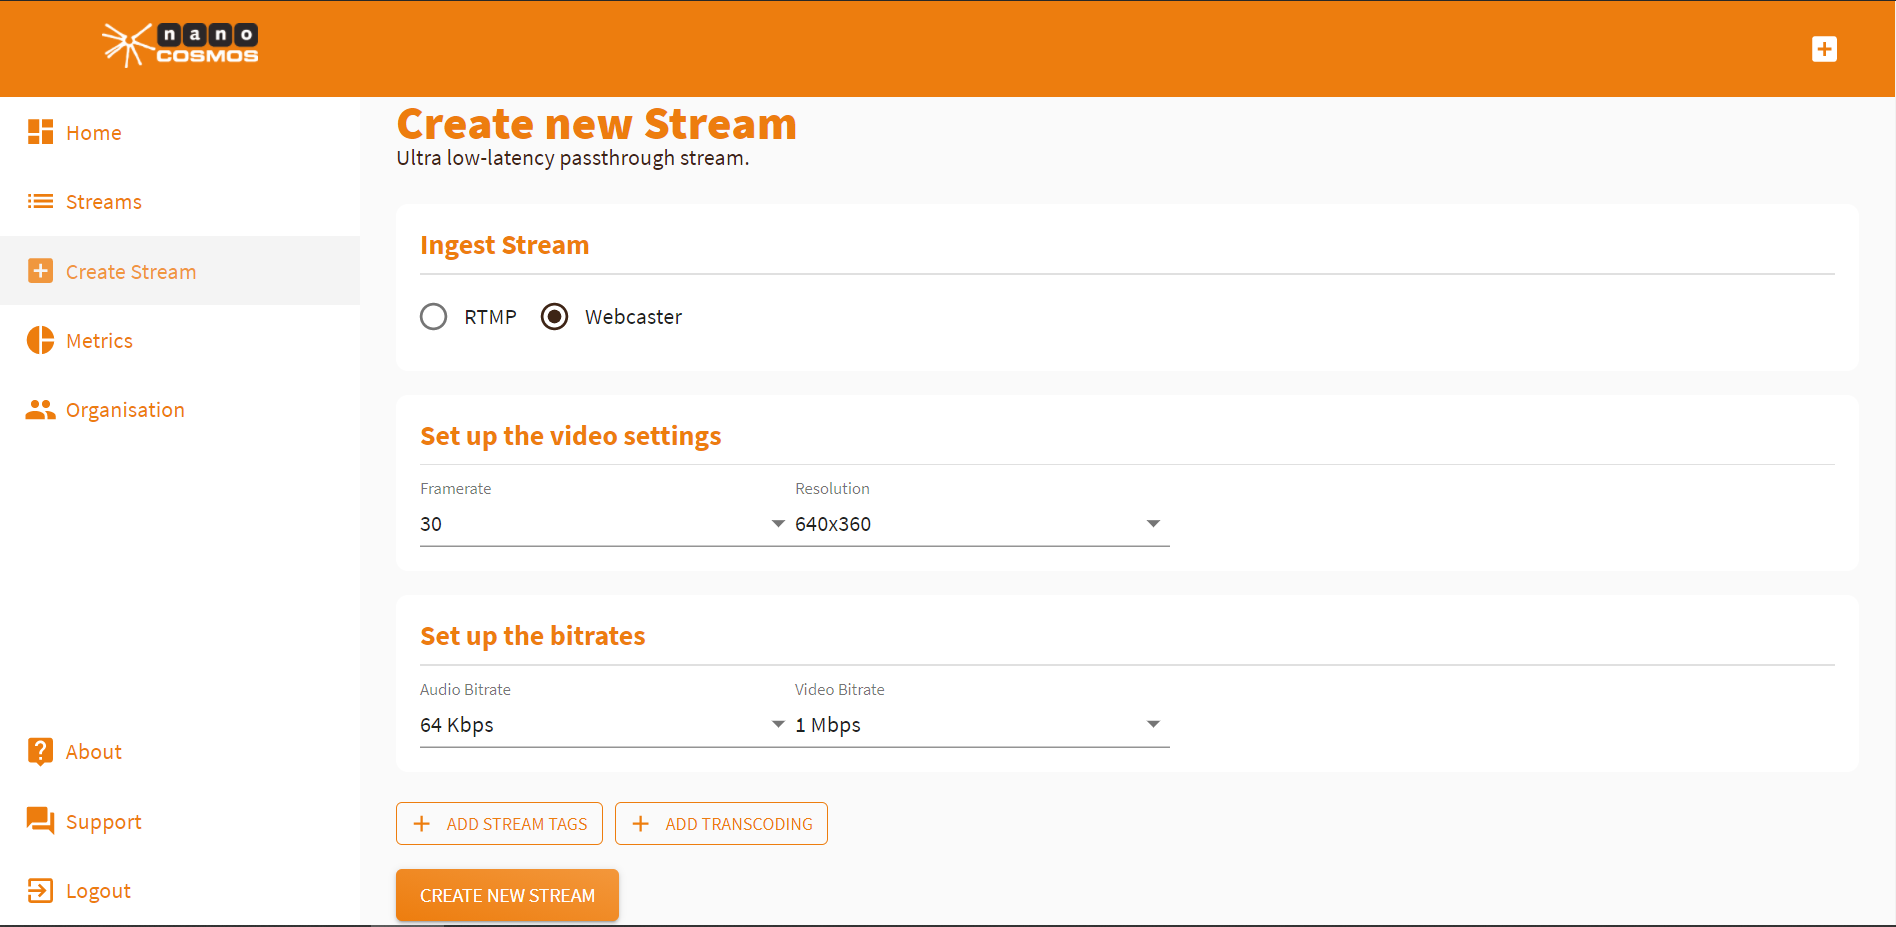
Set up the transcoding profiles
Transcoding allows your stream to perform perfectly adjusted to any network situation.
To learn more about adaptive bitrate and live transcoding and how to use it, click here.
Start broadcast
As soon as you have adjusted your preferences, press Create New Stream and you’ll be redirected automatically to the Stream Overview. Press Start Broadcast to start your stream directly from the browser.
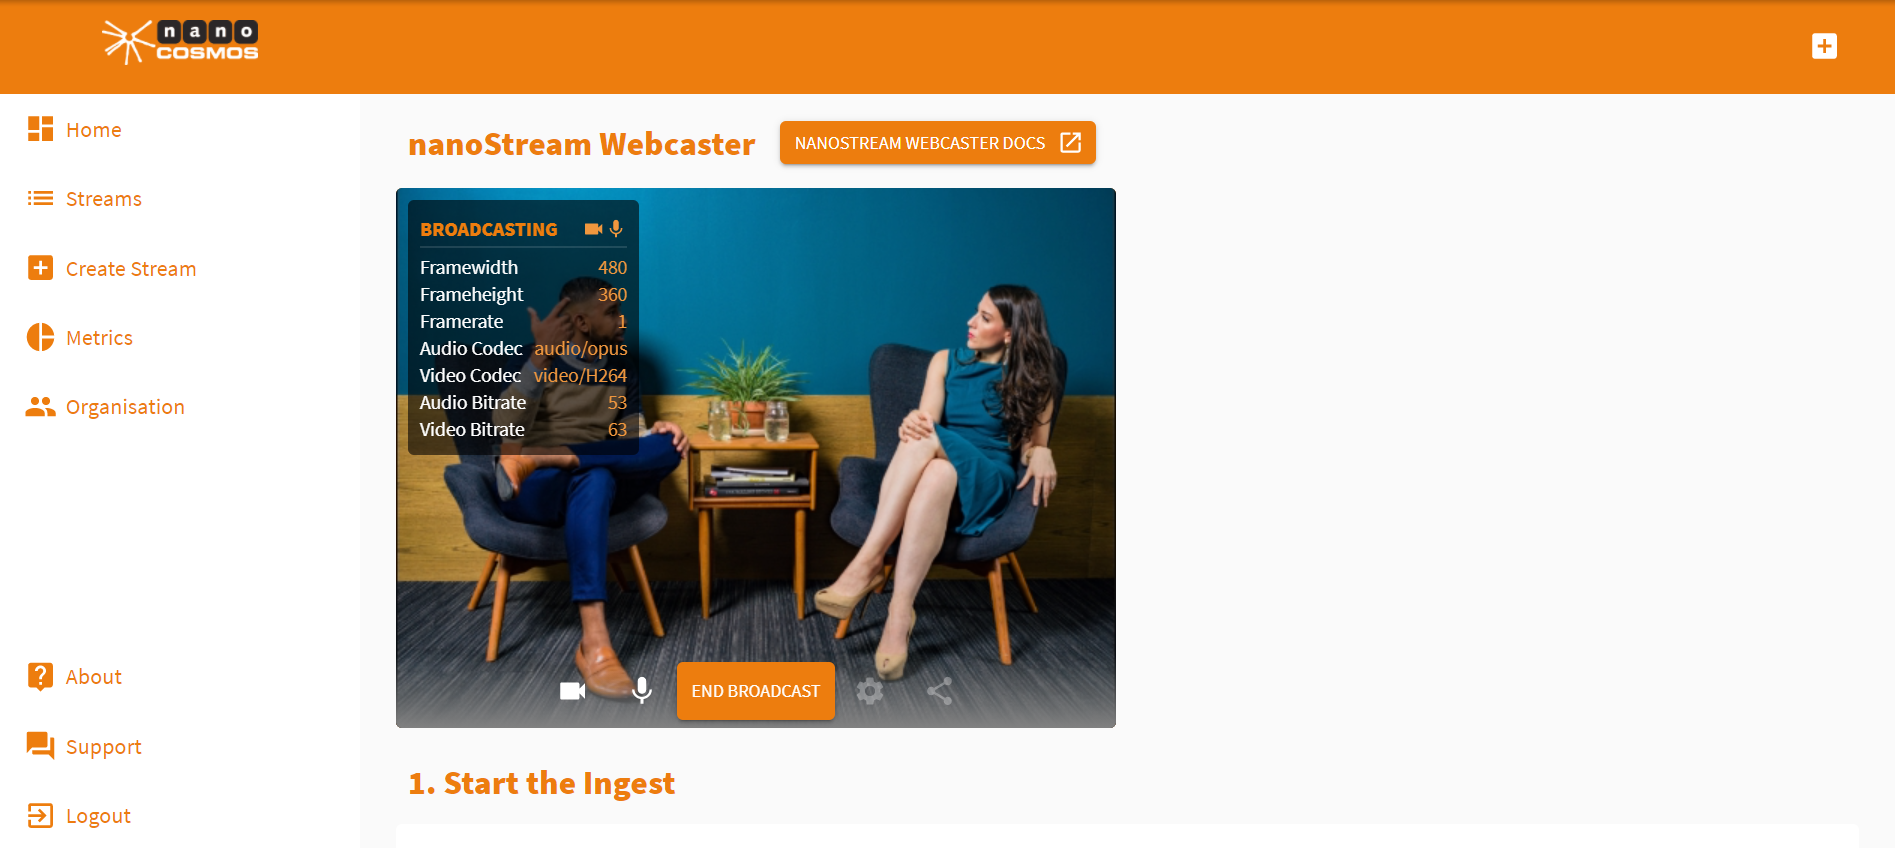
Use a live encoder
You can ingest a live stream with a live encoder software or hardware, using the RTMP ingest streamname and the RTMP ingest URL. Click here for information on ingesting a stream with the OBS software or Wirecast.

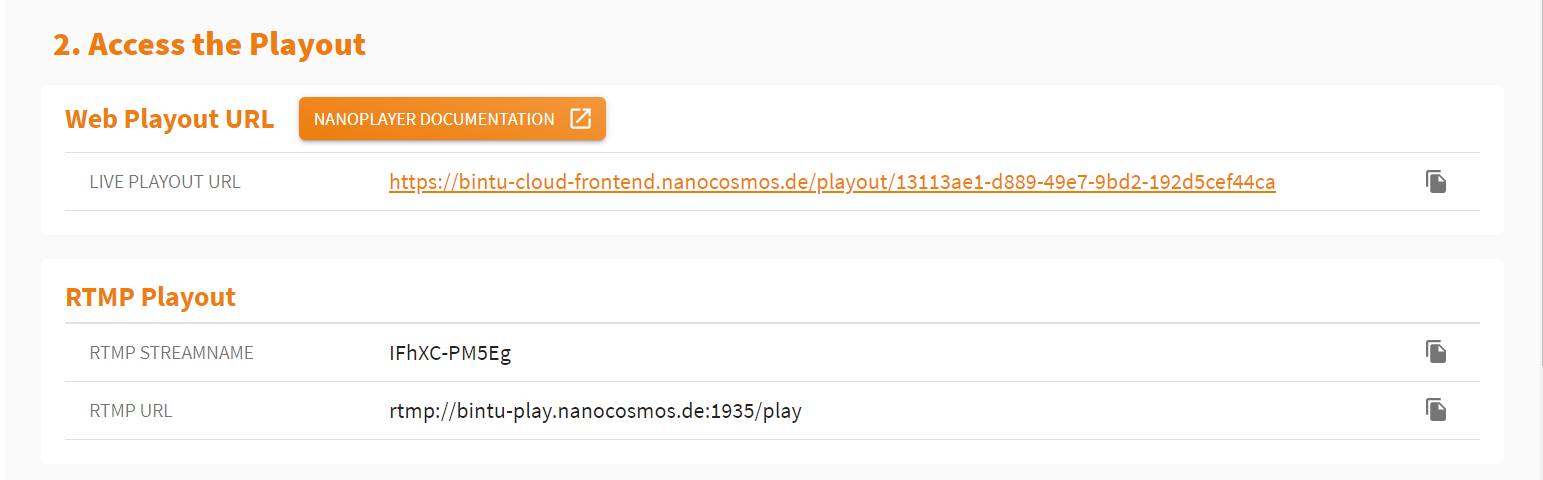
Live Playback with nanoPlayer
You find direct access to the nanoPlayer playout of your live stream.
If you are a secured organization, you can also Create a Secure Playback Token. (This applies only for secured organizations.)
To learn more about secure playbacks, click here.
If you want to embed the stream playout in your own webpage, use the H5Live Code Snippet.
To get more informations about the H5Live Player and its implementation, see our documentation.

The information displayed under Stream Overview shows an overview of your created stream(s).

Stream Playout
Clicking the Live Playout URL opens a new browser tab displaying your stream output. This is the default H5Live Playout of your created stream. It also displays important information on your stream. As you can see, the latency is below one second.
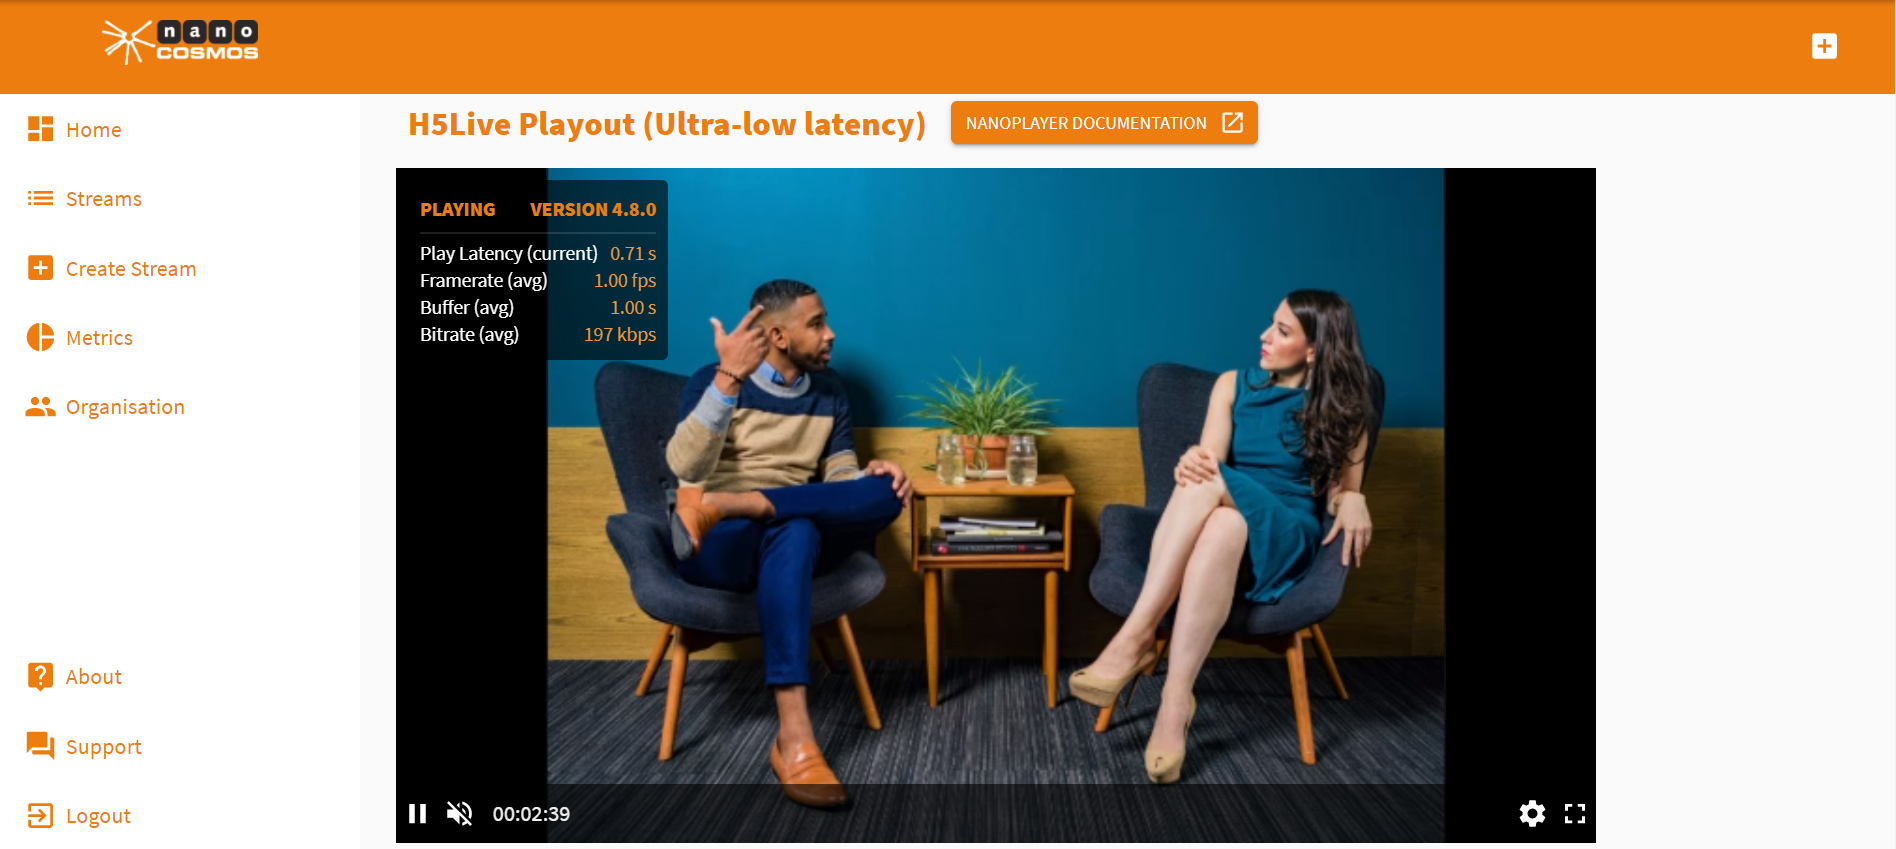
Share the Live Playout URL with the people you want to reach and let your stream go around the world in one second!
Support
Hopefully, this tutorial was helpful for you. For further assistance, use our contact form, browse the FAQs or contact us via support(at)nanocosmos.de